

Configure payroll
What this achieves
Section titled “What this achieves”Payroll configuration tells Humavera who is paid together, on what calendar, and under which country’s tax and insurance rules. Once it is in place, each pay period becomes a run you calculate, review, approve, and finalize rather than a spreadsheet you rebuild.
Required role: Administrator.
Before you start
Section titled “Before you start”Create your legal entities and add your employees first. A pay group belongs to one legal entity, and a run has nothing to calculate until employees exist.
Step 1: Create a pay group
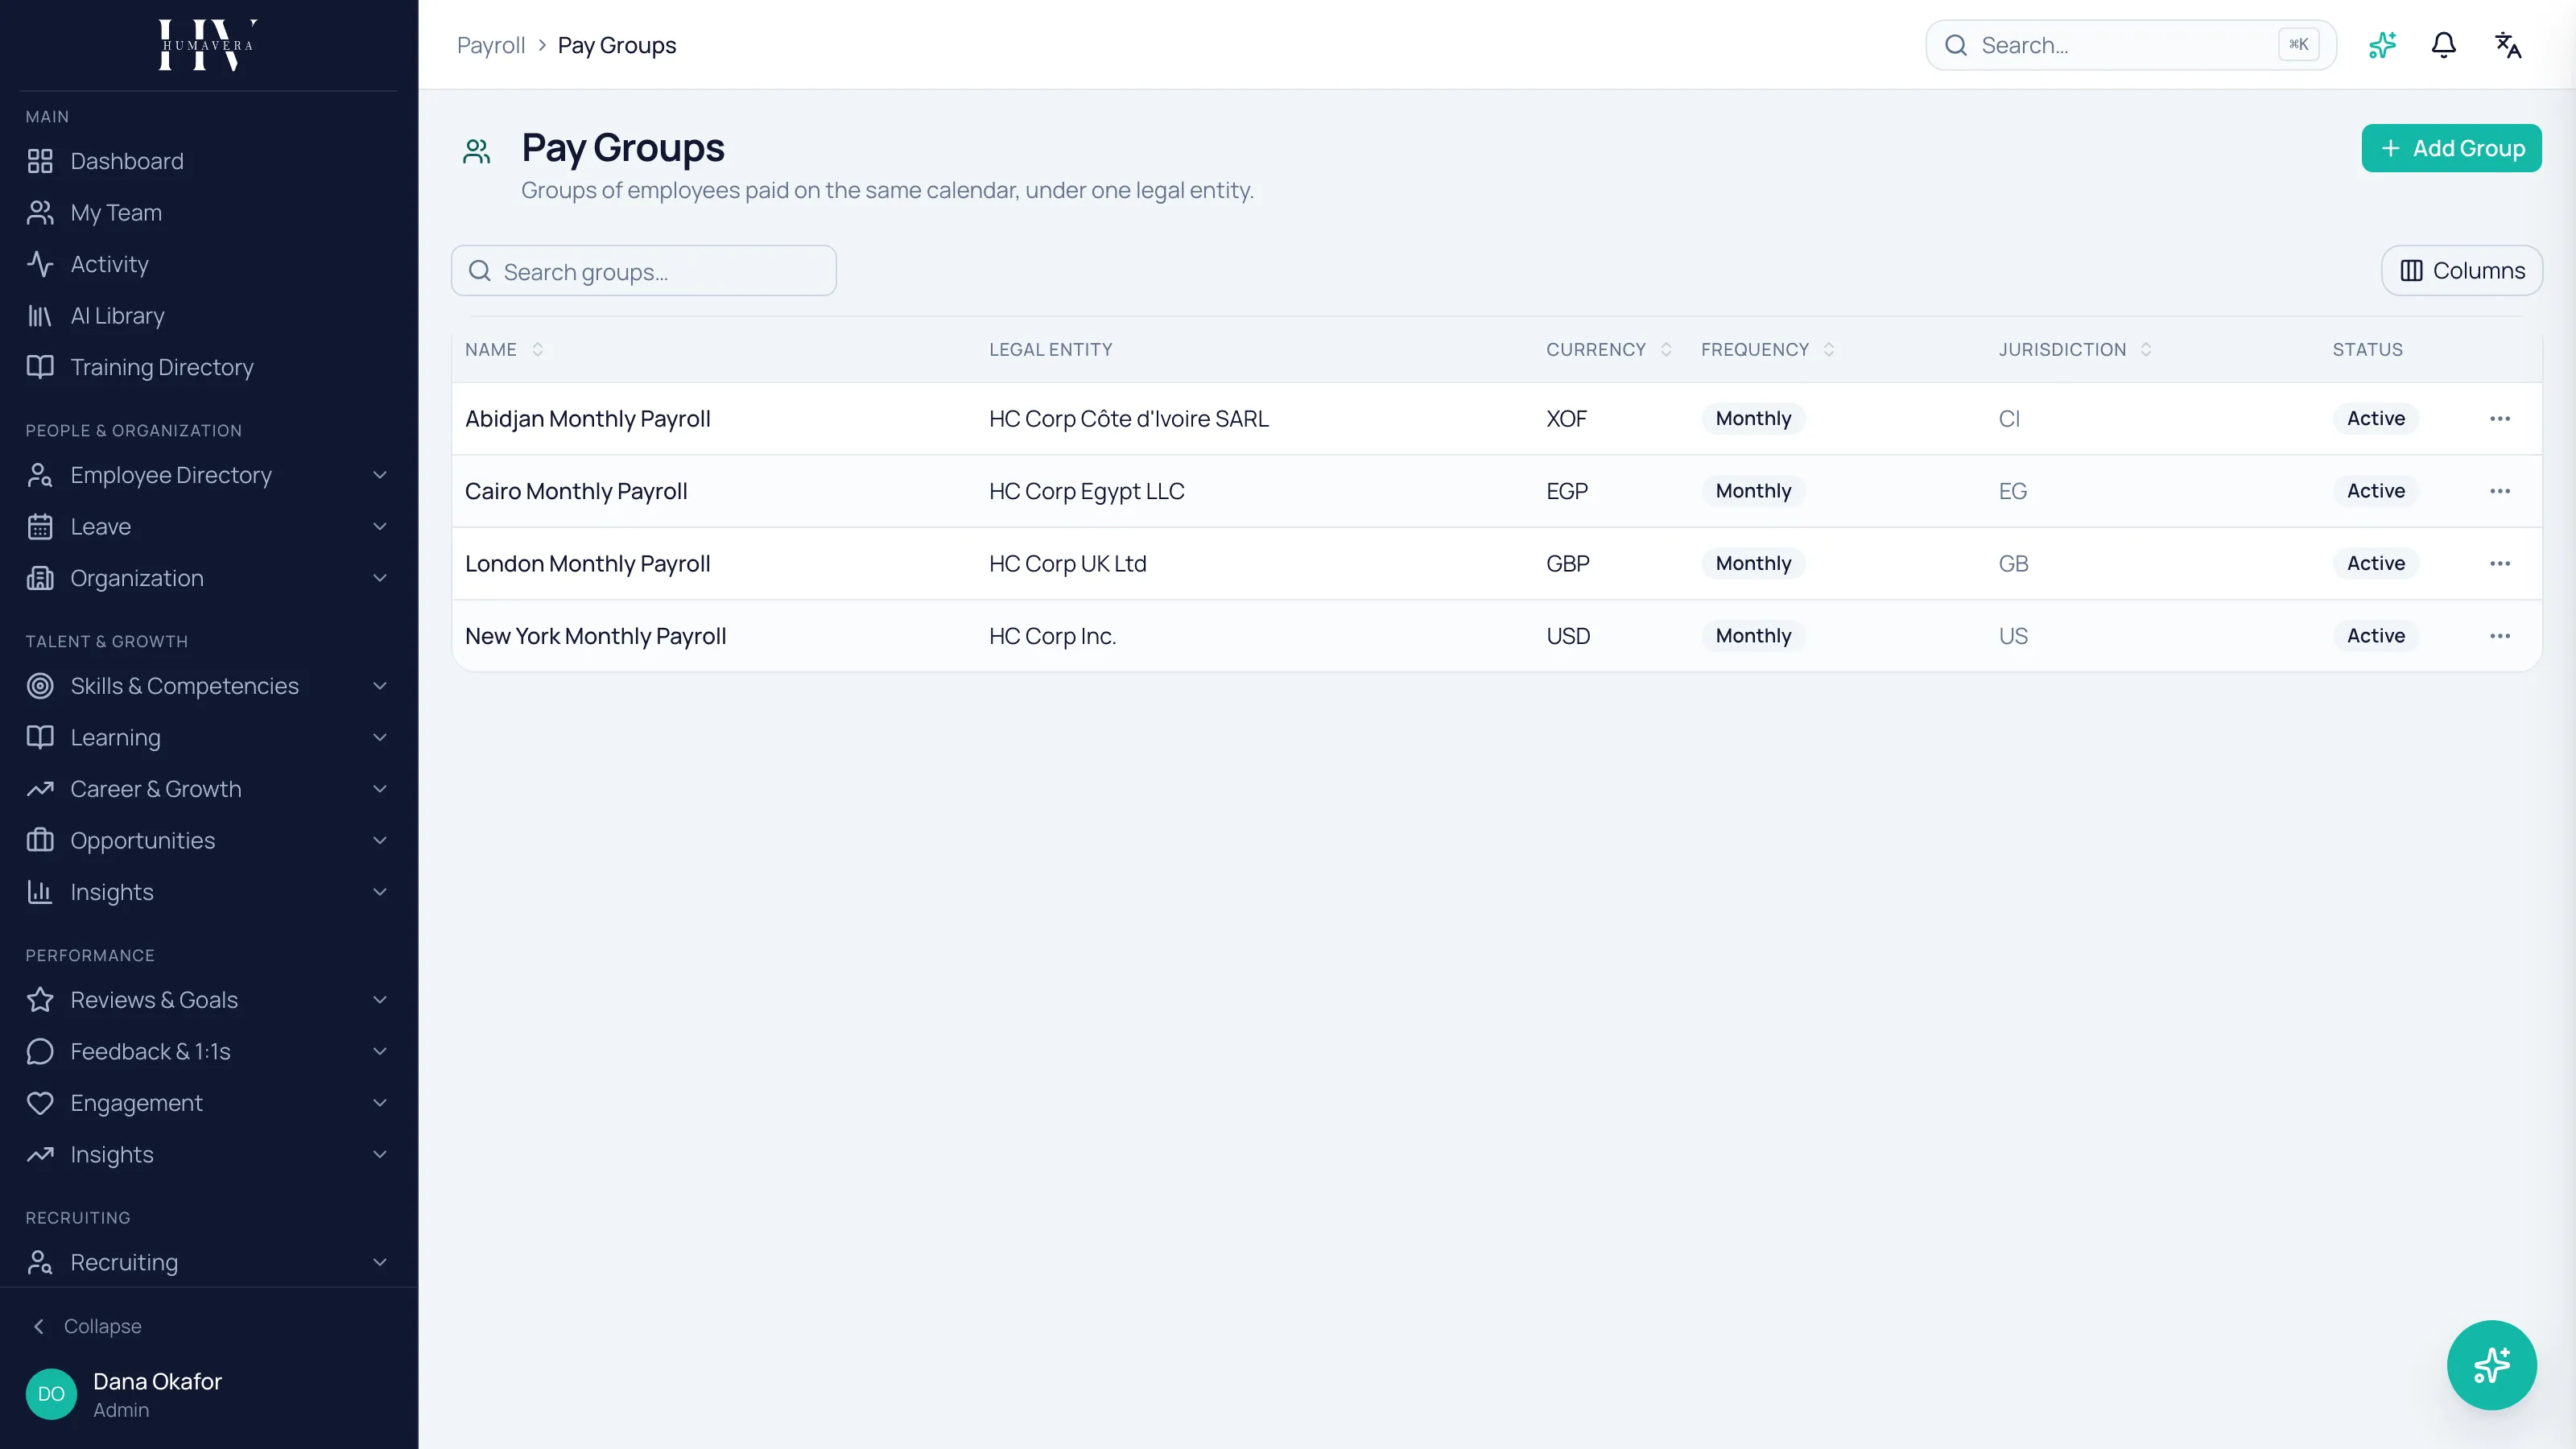
Section titled “Step 1: Create a pay group”A pay group is a set of employees paid on the same calendar, under one legal entity.
- Go to Payroll → Pay Groups.
- Select Add Group.
- Fill in the group’s details and save.
Example: HC Corp UK Ltd pays its monthly salaried London staff in one pay group, and its weekly-paid warehouse staff in another, because the calendar differs. Its sister entities need their own groups regardless of calendar, because a pay group belongs to exactly one legal entity — which is why the group runs a separate monthly cycle in each country it employs in.
Step 2: Set up a statutory profile
Section titled “Step 2: Set up a statutory profile”A statutory profile holds the effective-dated tax, social-insurance, and health-insurance rules for one jurisdiction.
- Go to Payroll → Statutory Profiles.
- Select Add Profile.
- Choose the jurisdiction and set the effective date.
- Add the rules the jurisdiction requires, using Add Bracket, Add Tier, Add Contribution, or Add Tax Layer as appropriate.
- Save the profile.
Example: for HC Corp UK Ltd, the UK PAYE basic, higher, and additional rate bands are entered as three brackets on one profile, each with its own threshold and rate. National Insurance and workplace pension auto-enrolment are added as contributions on the same profile, effective 6 April 2026 so that they apply from the start of the 2026/27 tax year.
Step 3: Run payroll
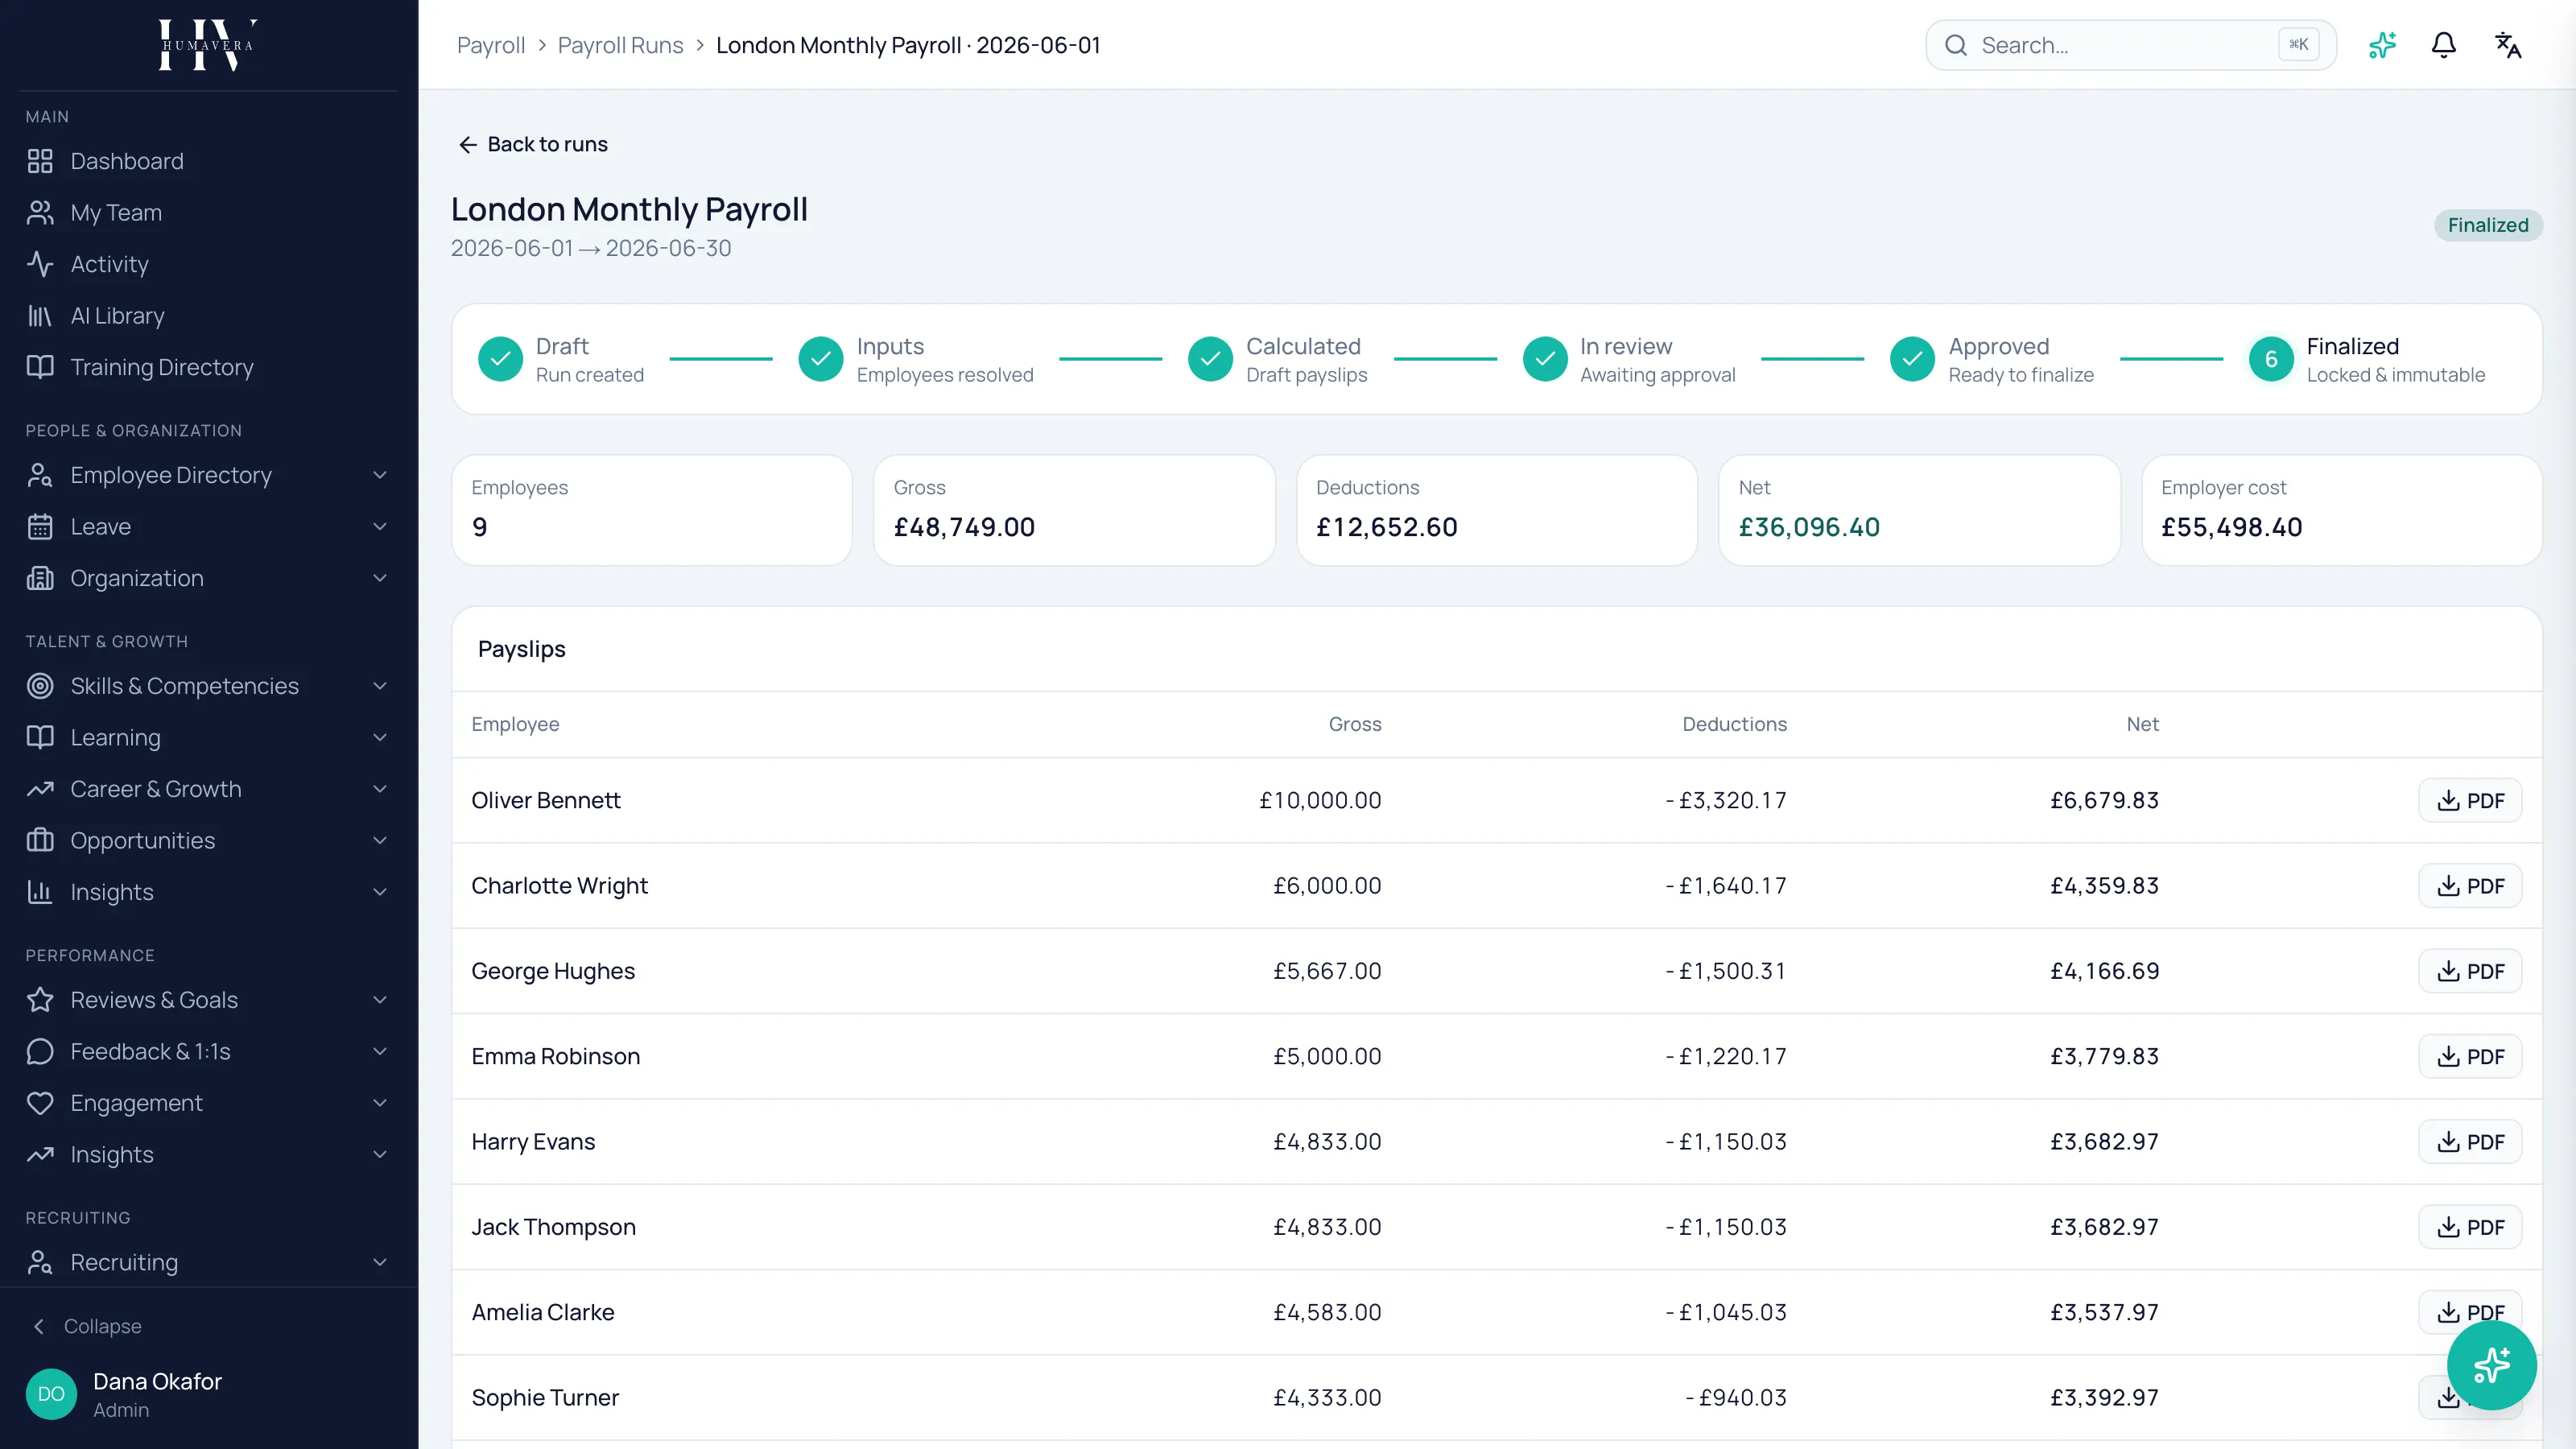
Section titled “Step 3: Run payroll”- Go to Payroll → Payroll Runs.
- Select New run, choose the pay group and period, and create it.
- Select Gather inputs to resolve which employees are in the run.
- Select Calculate to produce draft payslips.
- Select Submit for review.
- A second admin selects Approve.
- Select Finalize.
The run lifecycle
Section titled “The run lifecycle”| Option | Description |
|---|---|
| Draft | The run has been created but nothing is calculated yet. |
| Inputs | Employees have been resolved into the run. |
| Calculated | Draft payslips exist and can be reviewed. |
| In review | The run is awaiting approval. |
| Approved | The run is approved and ready to finalize. |
| Finalized | The run is locked and cannot be changed. |
Why someone else has to approve
Section titled “Why someone else has to approve”You cannot approve a run you started yourself. Humavera enforces separation of duties, so the Approve action is unavailable to the admin who initiated the run and a different admin must act on it.
Example: if Priya Raman creates and calculates the March 2026 run, she cannot approve it. Daniel Okonkwo must approve it before anyone can finalize it.
What happens next
Section titled “What happens next”Finalizing locks the run and makes payslips available to employees under Payroll → My Payslips. From there you can configure pay elements, loans, and commission, or produce reports from the finalized data.
Related
Section titled “Related”© 2025-2026 Humavera Documentation - BPilot Ltd. All Rights Reserved