

Invite your team
What this achieves
Section titled “What this achieves”An invitation gives a colleague their own sign-in and a role that decides what they can see and do. Until you invite them, you are the only person who can act in the workspace, so approvals and reviews have nowhere to go.
Required role: Administrator.
-
Go to Settings → Users.
-
Select Invite User.
-
Enter the person’s email address.
Example:
priya.raman@hc-corp.example— use their work address, because it is also how they sign in. -
Enter their first and last name.
-
Choose their Role.
-
Optionally link them to an existing employee record under Employee profile (optional).
-
Select Send Invite.
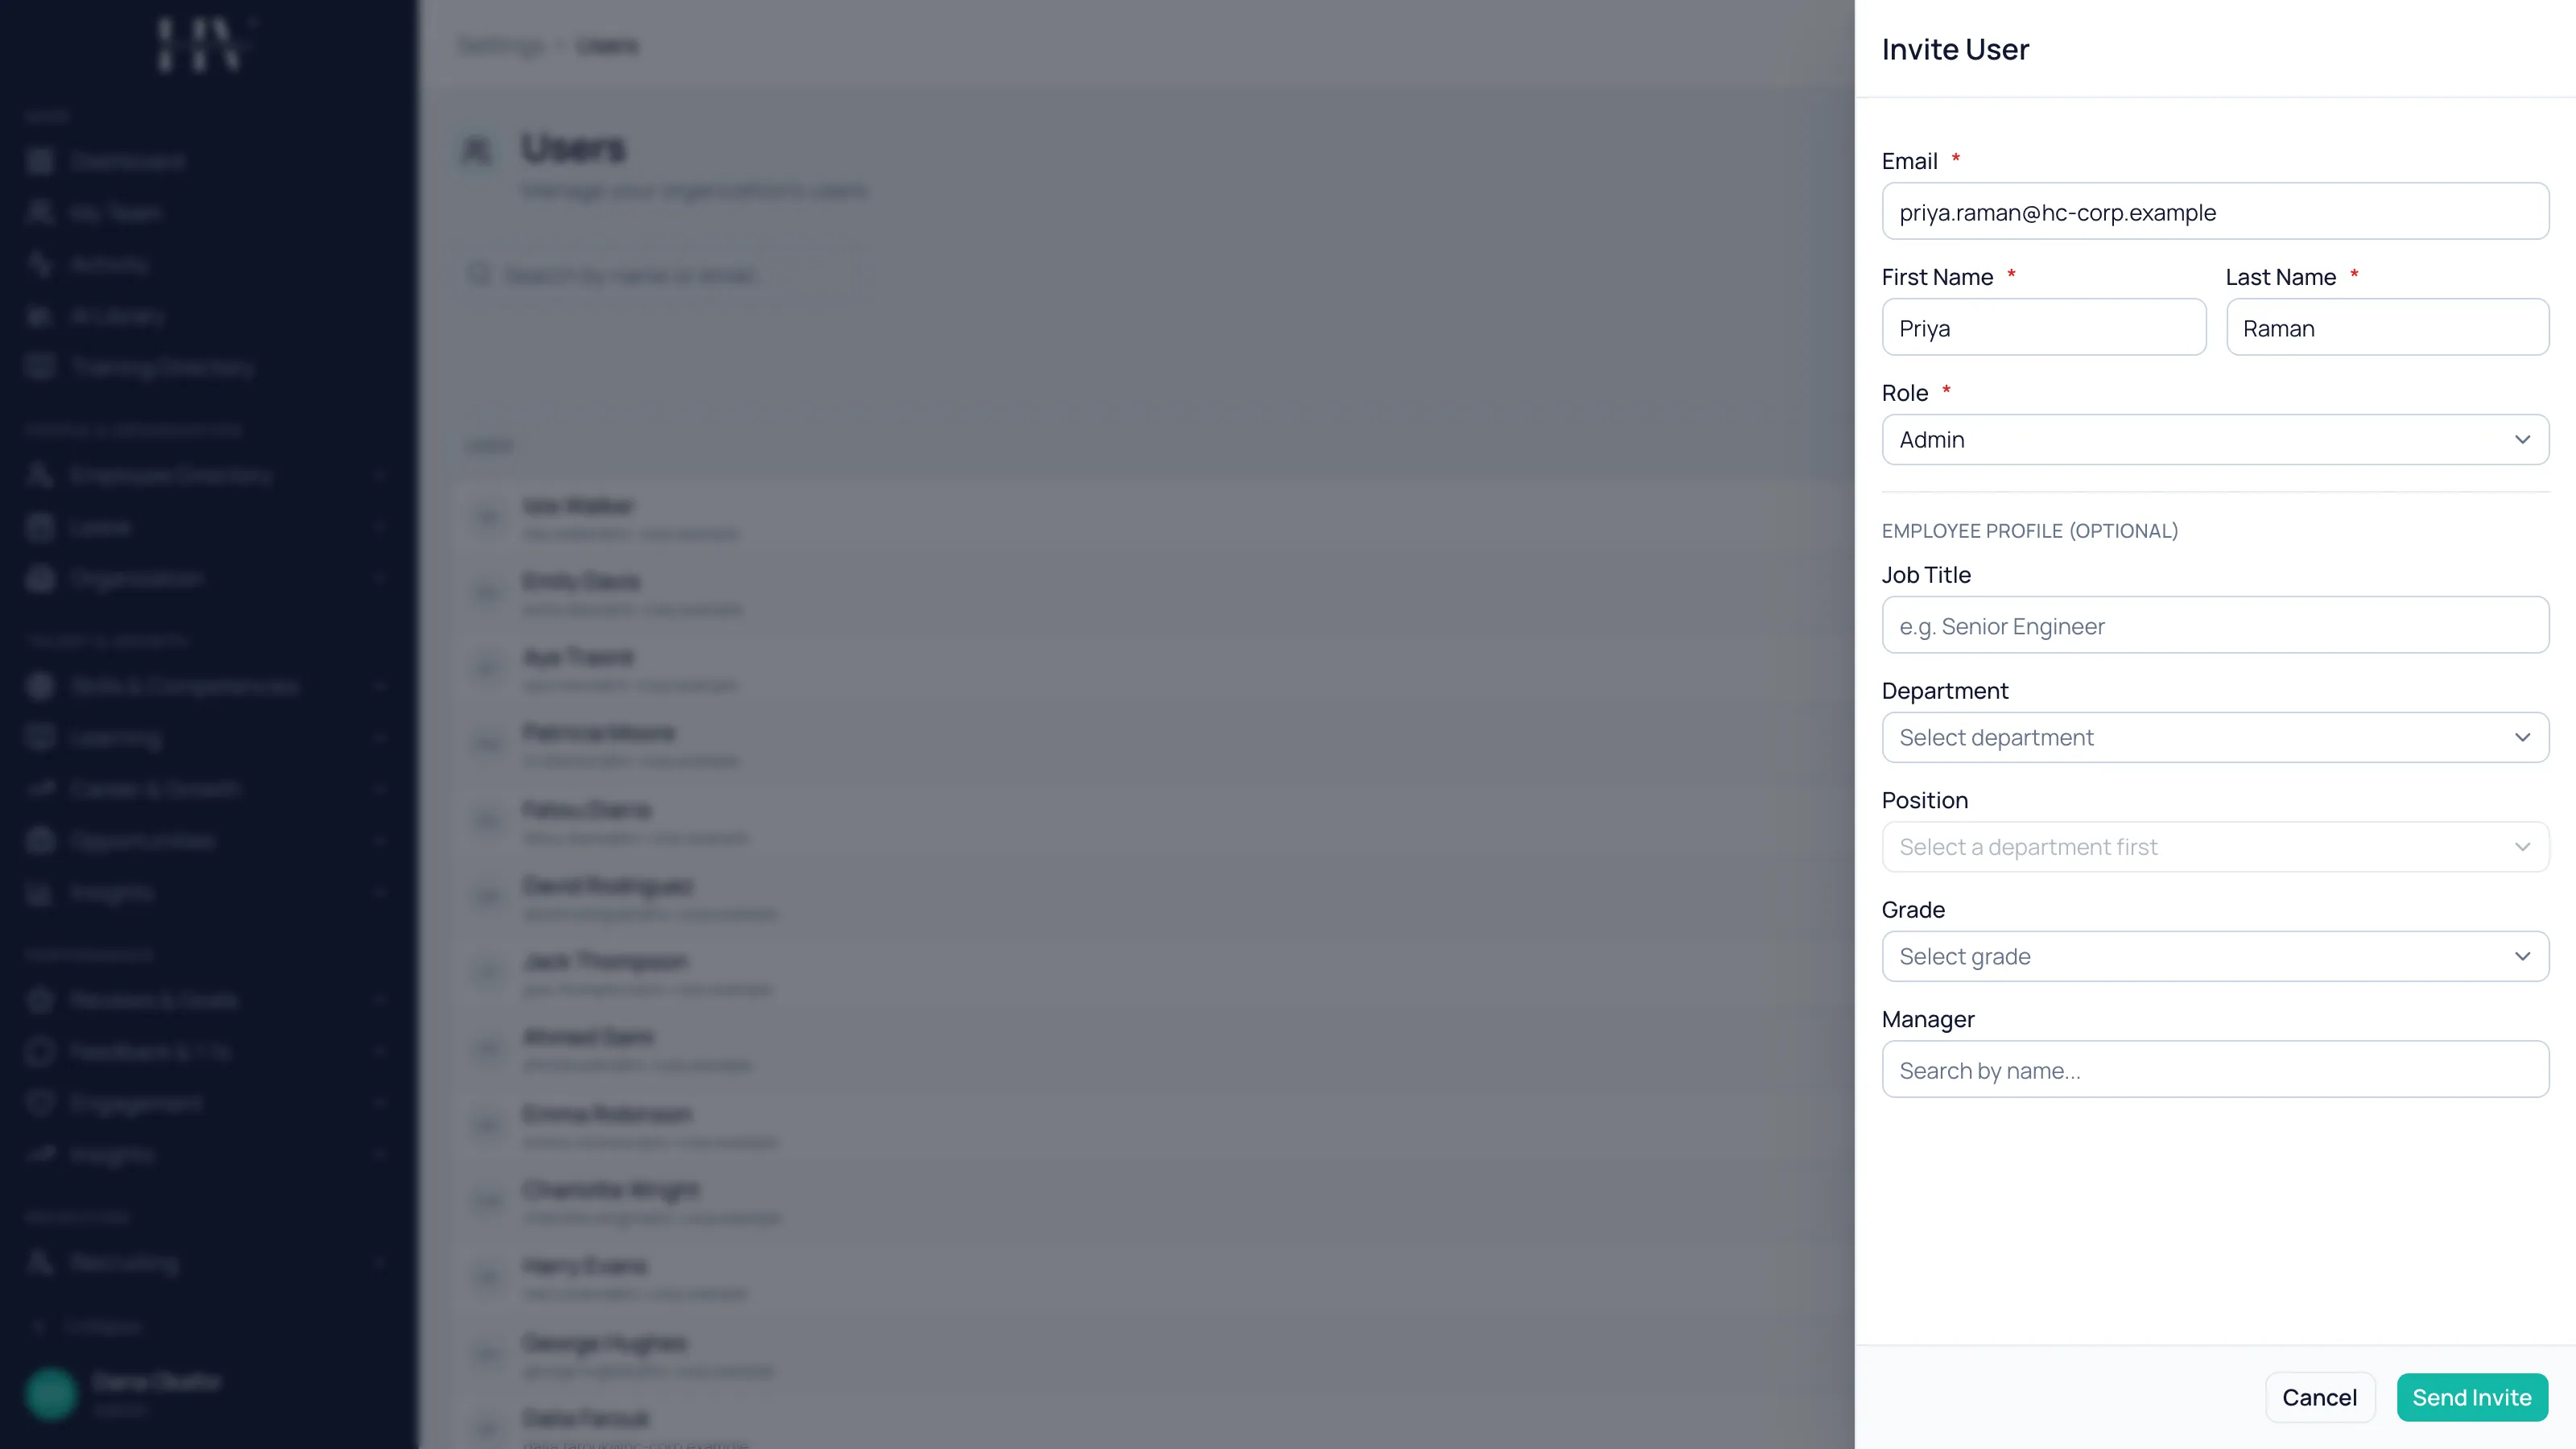
Choosing a role
Section titled “Choosing a role”The role decides which parts of Humavera the person sees. Navigation, and the pages behind it, change with the role.
| Option | Description |
|---|---|
| Admin | Configures the workspace: organization, payroll, settings, and users. Sees company-wide data. |
| Manager | Manages their own reports: team requests, team reviews, and team-level insights. Does not see company-wide data. |
| Employee | Uses their own records: payslips, leave requests, learning, and goals. |
| Instructor | Runs learning delivery: instructor-led sessions, question banks, rubrics, and grading. |
Example: Priya Raman approves payroll, so she needs the Admin role — a manager cannot reach Payroll → Payroll Runs at all. Olivia Bennett only approves leave for her own engineers, so the Manager role is enough.
If an invitation is not accepted
Section titled “If an invitation is not accepted”Find the person in the list and use Resend Invite. You can also Lock a user to stop them signing in, and Unlock them to restore access.
What happens next
Section titled “What happens next”The invited person receives an email, sets their password, and signs in to the workspace with the role you chose. Once they are in, work that routes to a role — approvals, reviews, and tasks — starts reaching a real person instead of waiting.
Related
Section titled “Related”© 2025-2026 Humavera Documentation - BPilot Ltd. All Rights Reserved